History: MultilangVsNetQuickTourAsp
Preview of version: 6
Multi-Language Add-In for Visual Studio
Quick Tour (ASP.NET 2.0)
Activating the Multi-Language Add-In
After you have installed the Add-In, there will be a new menu item in the Tools menu in Visual Studio.
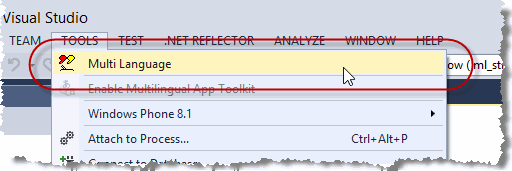
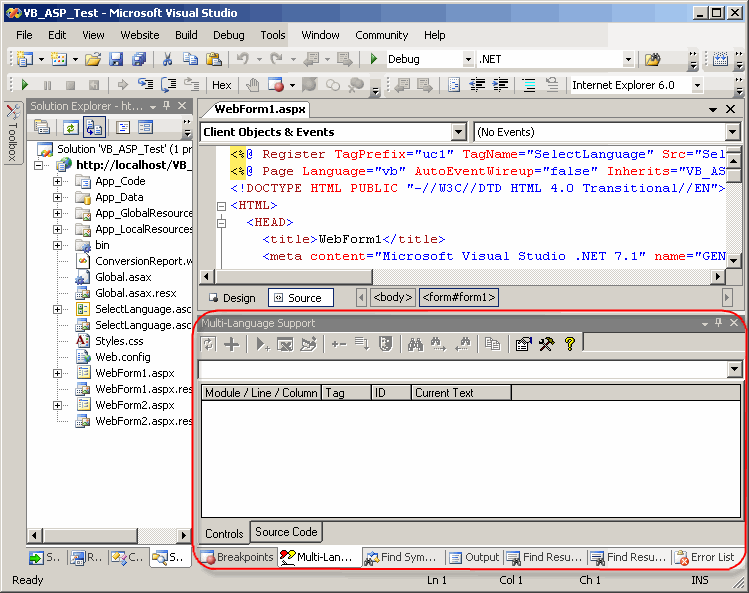
This menu item activates the Add-In and shows it in a tool-window. You can dock this window at the side of the main Visual Studio window, or drag it into a tab group, like other tool windows in Visual Studio. It's probably best to place it at the bottom, in a wide format.
Selecting a project
A Visual Studio solution may contain multiple projects. However, the Multi-Language Add-In always works with a single project. To get started, you must first select the project. There are two ways to do this.
| from a dialog | When you select the Add-In from the tools menu, it will probably show a list of the projects in a dialog. Simply select the project and click on OK. 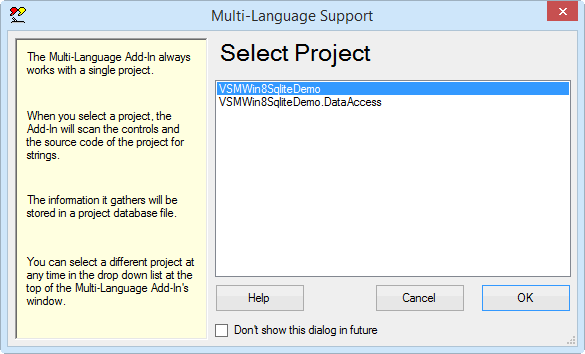
This dialog can be disabled, so if somebody else has already worked with the Add-In, it might not appear. |
| from a drop down list | At the top of the Add-In's main window, just below the toolbar, there is a drop down project list 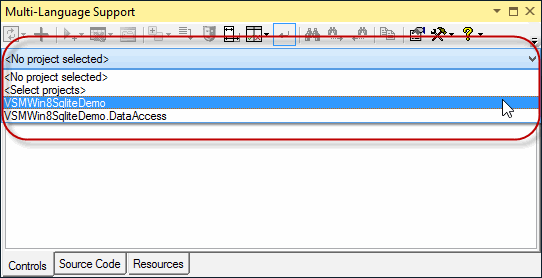
You can select a different project at any time from this list. |
Initialising the project for localization
|
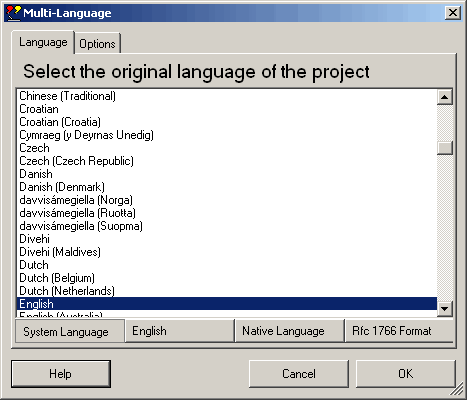
When you select a project for the first time, you must specify what the original language of the project is. The Add-In will show a list of the languages supported by Windows. Select the original language and click on OK. The buttons below the list change the way the list is displayed. In particular, the button English simply shows the language names in English. It does not select English in the list. |
|
|
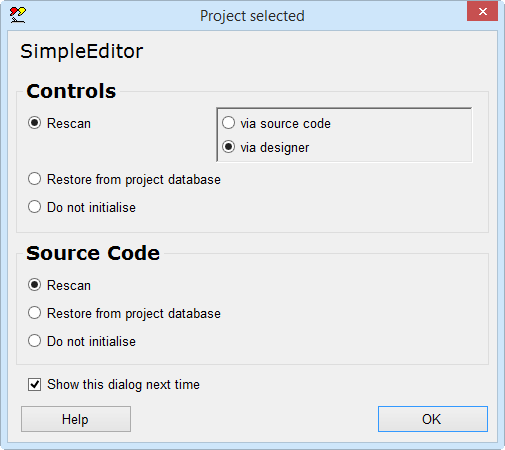
This dialog will probably be followed by second dialog, with options for scanning the project. Just click on OK to accept the default options. |
The Add-In will now add two new files to your project.
| <project name>_ml.mlb | This is the project database used by the Add-In. It is added to App_Data subdirectory. |
| mlstring.vb or mlstring.cs | This module contains support functions, in particular the function ml_string(), which is used to load localized strings. It is added to the App_Code subdirectory. |
Scanning the project
The Add-In will now scan the project. This is performed in two phases:
- scanning the HTML and ASP code
- scanning source code
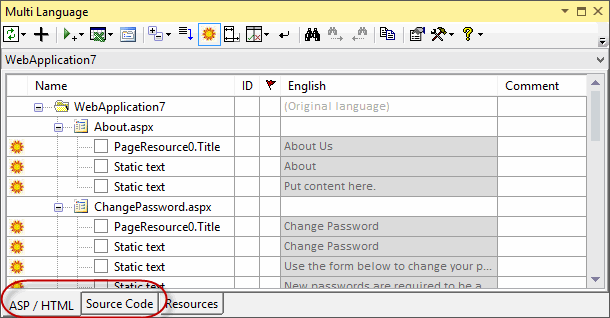
In the first phase, the ASP files are scanned for ASP controls with localizable attributes and for static text in the HTML code. In the second phase, the source code of the project is scanned for texts which may require translation.
|
The results of the scan are displayed in two separate grids in the Add-In's window. You can switch between these grids using the tabs at the bottom of the window. |
Adding a second language
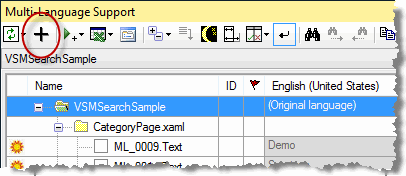
To add a new language to the project, click on the  symbol on the Add-In's toolbar
 |
|
|
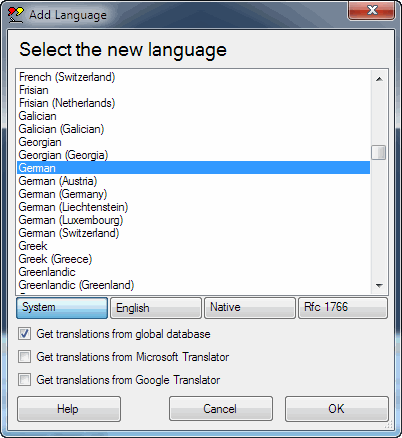
This brings up a dialog very similar to one where we selected the original language of the project. Select a new language and click on OK to add this language to the project. |
Some languages, such as German or French, are considered to be neutral languages. The regional variations, such as German(Germany), German(Austria), French(France) or French(Canada) are referred to as specific languages. You should always add the neutral language before adding a related specific language. If you do choose to add a specific language, the Add-In will give you the option of adding both neutral and specific languages or only the neutral language.
After adding the second language, the Add-In will
- add a new column to the grids for the new language
- search for translations of common texts such as OK and Cancel in the Global Translations Database
Now we will take a closer look at the two grids.
The ASP grid
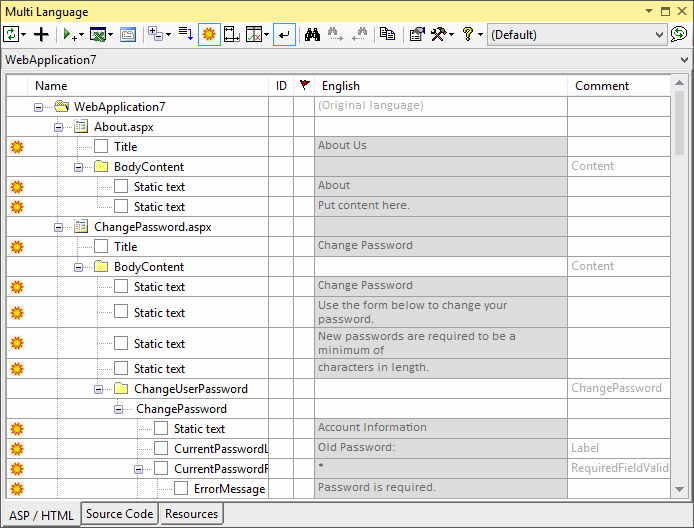
To see the ASP grid, make sure that the ASP/HTML tab at the bottom of the window is selected. The grid should look something like the following screenshot.
|
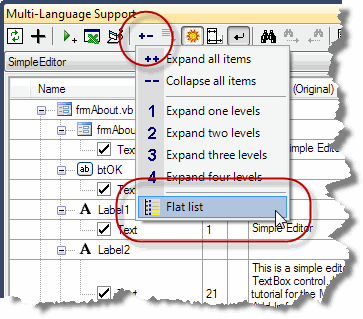
By default, the attributes are shown in a hierarchical manner, showing the association of attributes to controls. As an alternative, you can view the attributes on each ASP page in a flat list. To select this mode, click on the  button on the toolbar and then select Flat list from the menu.
The ASP grid will then look something like the following screenshot. |
|
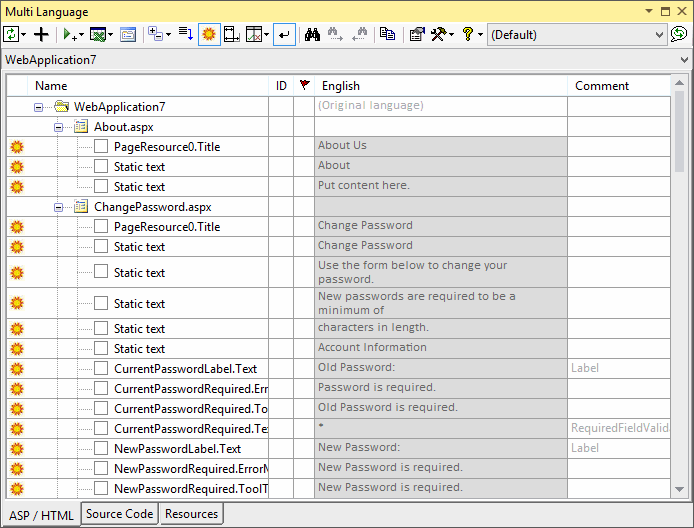
To the left of the property name there is a check box which indicates whether the property has been selected for translation. Initially, none of the properties are selected. To select a property, simply click on the check box.

As you can see, the grid has a column for each language in the project. Once a property has been selected, you can enter a translation simply by clicking on the cell in the appropriate column and entering the translation. If you are able to translate the text yourself, this is the easiest way enter translations.
If a text is shown in light grey, then it is the text which would be retrieved at runtime via the resource fallback mechanism. In general, if a text is not defined for a specific language (e.g. Spanish(Mexico)) then the text for the neutral language (e.g. Spanish) would be used. If this has not been defined, then the original text in the project would be used.
When you select a property, the ASP code will be modified, so that the text will be read from a resource file. The exact modification depends on several factors, as described below:
| Attribute of a named ASP control | The attribute meta:resourcekey is added. The name of the resource key is identical to the name of the control. Before <asp:button id="btSearch" runat="server" Width="88px" Text="Search"></asp:button> After <asp:button id="btSearch" runat="server" Width="88px" Text="Search" meta:resourcekey="btSearch"></asp:button> |
| Attribute of an unnamed ASP control | The attribute meta:resourcekey is added. A name for the resource key in the format ML_nnnn is generated automatically. Before <asp:ListItem Value="Ja" Text="Ja"></asp:ListItem> After <asp:ListItem Value="Ja" Text="Ja" meta:resourcekey="ML_0009"></asp:ListItem> |
| Static HTML Text | The text is replaced by an asp:Literal tag. A name in the form ML_nnnn is generated automatically and used as both id and resource key. Before Uw contactgegevens After <asp:Literal ID="ML_0068" runat="server" meta:resourcekey="ML_0068" Text="Uw contactgegevens"></asp:Literal> |
Specifying the attribute meta:resourcekey will cause ASP.NET to initialise the localizable properties of the control from a resource file. The asp:Literal control is the recommended method of localizing static text on an ASP page.
If you select multiple attributes of the same control, the attribute meta:resource key only needs to be added once. If you deselect all attributes of a controls, then the attribute meta:resource will be removed.
If there are texts which you do not wish to translate, you have the option of hiding these texts, so that they no longer appear in the grid. This is a good practice, because it makes it easier to find new texts when the project is modified. To hide an attribute, we first click on the sun symbol  at the left hand margin. The sun symbol is replaced by a moon symbol
  .
.

To actually hide the lines, click on the mask symbol on the toolbar  . If you want the hidden attributes to be shown again, click on the
  button on the toolbar and select ''Show hidden properties" from the menu.
The source code grid
To see the source code grid, make sure that the source code tab at the bottom of the window is selected. The grid should look something like the following screenshot.

As in the controls grid, you can select a string for translation by clicking in the checkbox to the left of the line number. In contrast to the controls grid however, none of the texts are selected automatically.
When you click on a line in the source code grid, the corresponding line in the source code will be shown in the source editor. Alternativly, if you select a line in the source editor, which contains a string, you can locate this line in the source code grid by clicking on the goto line button  on the toolbar.
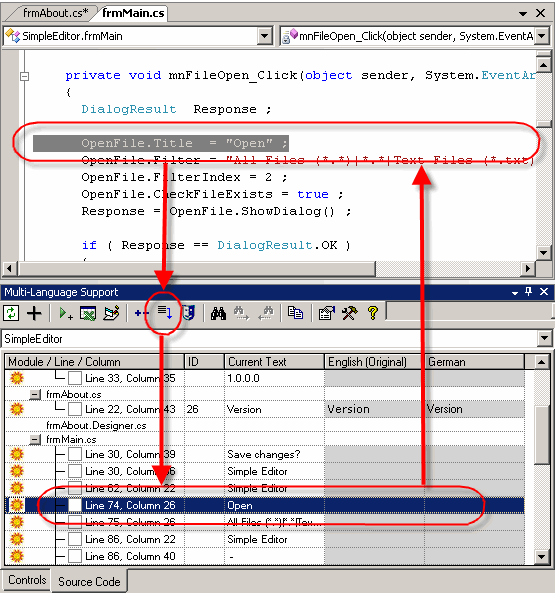
When you select a string for translation by clicking on the checkbox, the Add-In will assign a string ID number to the text and insert a call to the function ml_string() into the source code.
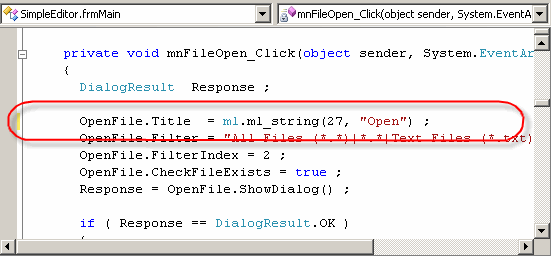
As you can see, this function has two parameters:
- the String ID number and
- the original text
In fact only the string ID will actually be used, so you could consider the original text as a comment. Leaving the original text in the source code serves to make the code more readable.
The exact format of the function ml_string depends on the computer language used in the project.
| C# | OpenFile.Title = ml.ml_string(27, "Open") ; |
| VB.NET | OpenFile.Title = ml_string(27,"Open") |
| C++ | OpenFile->Title = ML_STRING(28, "Open") ; |
The function ml_string is implemented in the module mlstring which was added to the project from a template file (usually in the directory C:\Program Files\MultiLang2005\Templates).
Once a string has been selected for translation, you can enter a translation simply by typing a new text into the grid.
As with the controls grid, we also have the option of hiding texts which do not require translation. For example, none of the texts in the module AssemblyInfo.cs need to be translated.
As before, we hide a string by clicking on the sun symbol  at the left hand margin, which is then replaced by a moon symbol
  . At the same time, the comment //MLHIDE ('MLHIDE in VB.NET) is added to the end of the source code line, to mark it as hidden.
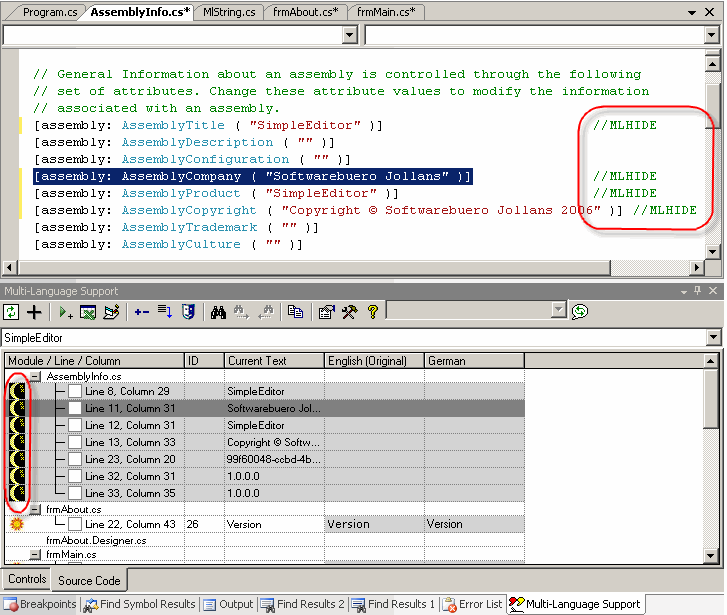
To actually hide the lines, click on the mask symbol on the toolbar  . This works a little differently to controls grid. The hidden items are collapsed behind a new node hidden and you can view them at any time simply be expanding this node.

It is good practice to either select or hide every string in the project. If new strings are added to the source code, it is then much easier to find the new strings in the grid. Of course, you can also add the MLHIDE comment to lines in the source code editor. When the Add-In scans the project, it will automatically hide these strings.