History: MultilangVsNetQuickTourAsp
Preview of version: 3
Multi-Language Add-In for Visual Studio
Quick Tour (ASP.NET 2.0)
Activating the Multi-Language Add-In
After you have installed the Add-In, there will be a new menu item in the Tools menu in Visual Studio.
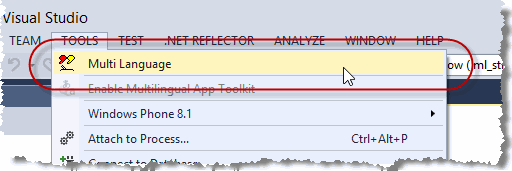
This menu item activates the Add-In and shows it in a tool-window. You can dock this window at the side of the main Visual Studio window, or drag it into a tab group, like other tool windows in Visual Studio. It's probably best to place it at the bottom, in a wide format.
Selecting a project
A Visual Studio solution may contain multiple projects. However, the Multi-Language Add-In always works with a single project. To get started, you must first select the project. There are two ways to do this.
| from a dialog | When you select the Add-In from the tools menu, it will probably show a list of the projects in a dialog. Simply select the project and click on OK. 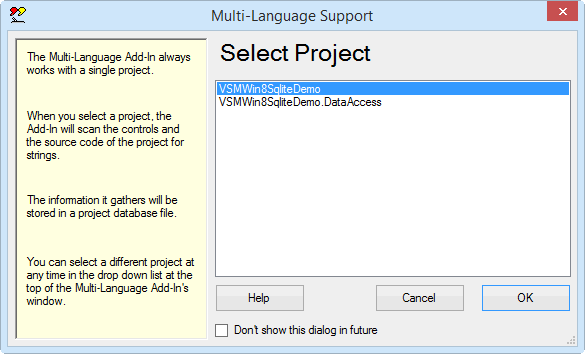
This dialog can be disabled, so if somebody else has already worked with the Add-In, it might not appear. |
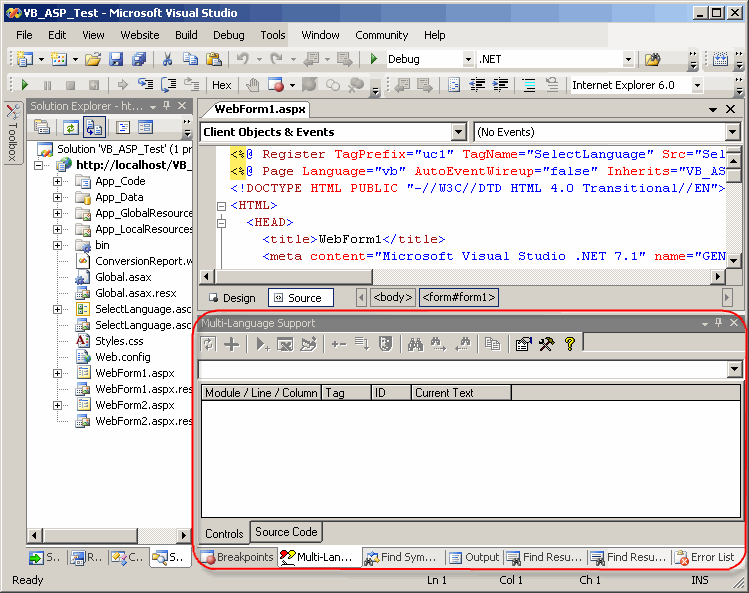
| from a drop down list | At the top of the Add-In's main window, just below the toolbar, there is a drop down project list 
You can select a different project at any time from this list. |
Initialising the project for localization
|
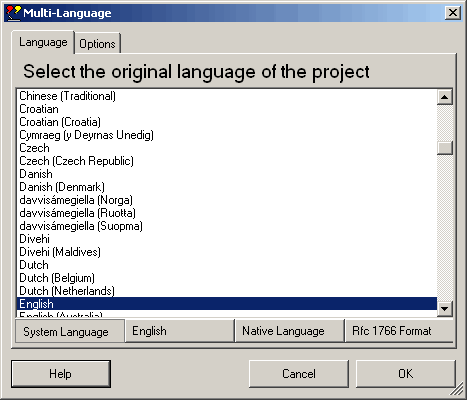
When you select a project for the first time, you must specify what the original language of the project is. The Add-In will show a list of the languages supported by Windows. Select the original language and click on OK. The buttons below the list change the way the list is displayed. In particular, the button English simply shows the language names in English. It does not select English in the list. |
|
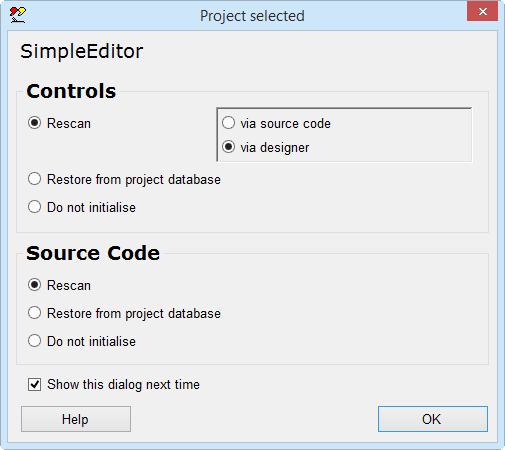
|
This dialog will probably be followed by second dialog, with options for scanning the project. Just click on OK to accept the default options. |
The Add-In will now add two new files to your project.
| <project name>_ml.mlb | This is the project database used by the Add-In. It is added to App_Data subdirectory. |
| mlstring.vb or mlstring.cs | This module contains support functions, in particular the function ml_string(), which is used to load localized strings. It is added to the App_Code subdirectory. |
Scanning the project
The Add-In will now scan the project. This is performed in two phases:
- scanning the HTML and ASP code
- scanning source code
In the first phase, the ASP files are scanned for ASP controls with localizable attributes and for static text in the HTML code. In the second phase, the source code of the project is scanned for texts which may require translation.
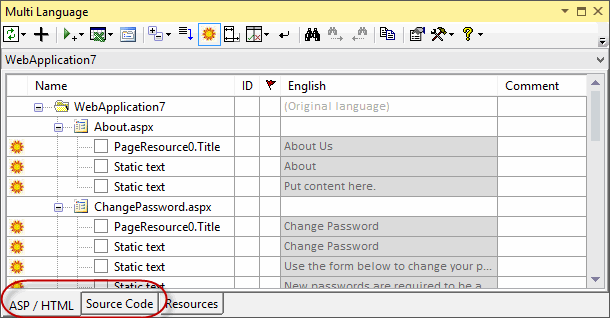
|
The results of the scan are displayed in two separate grids in the Add-In's window. You can switch between these grids using the tabs at the bottom of the window. |
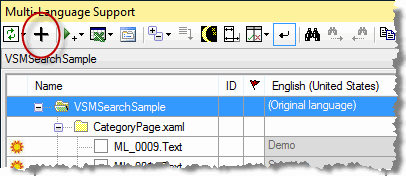
Adding a second language
To add a new language to the project, click on the  symbol on the Add-In's toolbar
 |
|

|
This brings up a dialog very similar to one where we selected the original language of the project. Select a new language and click on OK to add this language to the project. |
Some languages, such as German or French, are considered to be neutral languages. The regional variations, such as German(Germany), German(Austria), French(France) or French(Canada) are referred to as specific languages. You should always add the neutral language before adding a related specific language. If you do choose to add a specific language, the Add-In will give you the option of adding both neutral and specific languages or only the neutral language.
After adding the second language, the Add-In will
- add a new column to the grids for the new language
- search for translations of common texts such as OK and Cancel in the Global Translations Database
Now we will take a closer look at the two grids.
The ASP grid
To see the ASP grid, make sure that the ASP/HTML tab at the bottom of the window is selected. The grid should look something like the following screenshot.